-
 Inspiration
-
 Article
Woodworking is a timeless craft that offers both practicality and artistic expression. Whether you’re seeking a new hobby or looking to unleash your creativity, woodworking provides an avenue for both novices and seasoned artisans to engage with wood’s natural beauty and versatility.
The prospect of starting a woodworking project may seem daunting for beginners, with visions of intricate designs and complex techniques dancing in their minds. However, embracing simplicity is the key to a fulfilling journey in woodworking. This article will explore three straightforward yet rewarding woodworking projects explicitly tailored for beginners.
From functional pieces to decorative accents, these projects are designed to introduce fundamental woodworking skills while allowing ample room for personalisation and experimentation. With guidance and a willingness to learn, even those new to the craft can produce impressive results and lay the foundation for future woodworking endeavours.
Join us as we delve into the world of woodworking and discover the joy of creating with your hands. Whether crafting for practical purposes or simply for the pleasure of making, these projects will ignite your passion for woodworking and inspire a newfound appreciation for the artistry inherent in every piece of wood.
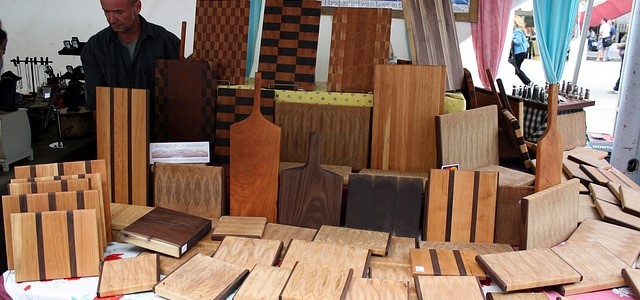
Project 1: The Cutting Board
Where better to start for beginner woodworkers than what is essentially just a square? Making a cutting board is a great choice for those looking to get to grips with the practicalities of woodworking and for giving newcomers something to quickly show for their efforts.
Design:
While you might want to opt for the traditional square, if you fancy spicing things up a bit, feel free to add a point or an indentation or two. Simply draw your final design on to the raw wood with your carpentry pencil, but be sure to use a ruler.
While it might be tempting to go wild, the typical beginner’s tool set probably won’t be able to cope with curves, so stick to straight lines for now.
The first cut is the deepest:
Scan your saw’s manual before making your first incision and carefully examine the safety information within. Woodworking’s a lot of fun, but there’s a lot of potential for things to go wrong.
Cutting:
Once you’re happy with the guidelines you’ve sketched in pencil, cut out your chosen shape. Then, smooth the rough edges with some medium-grit sandpaper.
Finisher:
Now that you’ve sanded everything down, it’s time to prepare your project for its day job. First, wipe off any excess wood dust, grease, or dirt. To save yourself some work, do this in the direction of the grain. Once you’ve applied three or four coats, you should be good to go.
Maintenance:
To get the most from your board, don’t put it in the dishwasher. Instead, wash it by hand and give it a fresh coat of finish every three to six months to keep it in tip-top shape.
Project 2: A Picture (Frame) Paints a thousand words
Congratulations, you’ve now graduated from a single square to several! A picture frame is the natural next step for a beginner woodworker, and you’ll use the techniques you learned with your cutting board.
Preparation:
Before you start, think of where you might put the finished product in your home. This will determine its size and whether or not you need to use a specific type of material to blend in with the existing décor.
Design:
As before, we’ll sketch our dimensions directly onto the timber with a carpentry pencil. However long you want it to be – bear in mind that each board’s inside (or short side) should be around an inch smaller than the width or height of the print that’ll sit in it.
Cutting:
If you want to be extra fancy, you can ‘mite,r’ the cormitreat this stage by setting your (specialised) saw at around 45 degrees relative to the corners. You can afford to be a little lax with the dimensions – as long as you ensure that both the longest and shortest pieces line up.
Glue or screw?
When putting the frame together, you’ve got two options. Either use a wood glue with an appropriate joiner or use a metal brace and screw in the pieces you want to attach.
If you’ve gone down the screw route, things should be pretty self-explanatory. If you’ve opted to glue, however, don’t be stingy. Use plenty of it and ram the pieces you want to join as close as possible. You might need clamps or a friend to hold them in place while hammering in your joiners.
Weigh the frame down on a flat floor to ensure it sets correctly, then let it dry for a few hours.
Finishing touches:
At this stage, you might want to try staining. Before you stain, you’ll need to make sure it’s nice and clean and well-sanded. What look you’re going for will determine what level of grit you should use, with rougher wood absorbing more stain. If you’ve got any leftover pieces from the cutting stage, use these to test for stains.
If you’ve used a softwood, you might want to invest in some wood conditioner to ensure an even spread. If you’re using hardwood – go for it, although you might need a few coats.
Project 3: The Window Box
Now that you’ve mastered the basics, it’s time to take things 3D. Window boxes are a great project for beginners and a brilliant place to keep plants for those with little room to spare.
What you’ll need:
- Timber boards around a quarter of an inch thick
- Tape Measure
- Paint Primer
- An electric drill
- Wood screws and a screwdriver
- Nails
- Hammer
- Wood paint (which will differ depending on how you plan to put the box outside or in)
Preparation:
First and foremost, determine the size of your box. Measure your window (or whatever space you plan to install it in) and consider how deep you’ll need it to be.
Materials:
If you’re installing the box outside, you’ll want timber that can withstand the elements, but since you’ll be priming and painting it, you’ll have a lot of leeway in your selection. If you’re putting it inside, what you choose depends on personal preference.
Supports:
If you’re putting your box outside and are dubious about the strength of your windowsill – it’s a good idea to put in some supports. If you’re feeling adventurous, knock these up yourself (we’d recommend pressure-treated wood) or buy a set. These are drilled into your exterior wall and affixed with either concrete or wood screws, but be sure to use a spirit level to avoid a lop-sided fitting.
The build:
First off, cut the boards that’ll make up the front and rear of your box. Once you’ve got these, cut out the base plank and line up the front panel. Mark out and drill your pilot holes, then use wood screws to secure the two pieces before repeating the process for the rear piece.
Now, we can move on to the side panels. Measure these out, but leave a little overhang on the back if you use supports. Then, screw them in using the method you used for the front and back panels.
The finish:
Now you’ve got the basic box ready, fill in the screw holes with wood filler and once dried, smooth down all your surfaces using sandpaper. If the box goes outside, you’ll want to prime the wood (which primer you’ll use depends on your colour scheme) and leave it to dry before painting the box. Again – if you’re installing it outside, we’d recommend using exterior paint to ensure the box can withstand the British climate.
Once you’re happy with the box, you can drill it onto your supports or place it wherever you see fit. The pros recommend drilling a couple of drainage holes and putting a layer of gravel at the bottom. Then, add your compost and stick it in some plants, and you’re good to go!
And You?
If you’ve got any recommendations for beginner-friendly woodworking projects or have any questions about the ones we’ve gone through – be sure to get in touch with International Timber via Twitter.
And if you’re tackling a more ambitious project and are looking for a suitable wood for the job – why not order our free product guide today?